A Handknit Christmas Stocking for Emilia
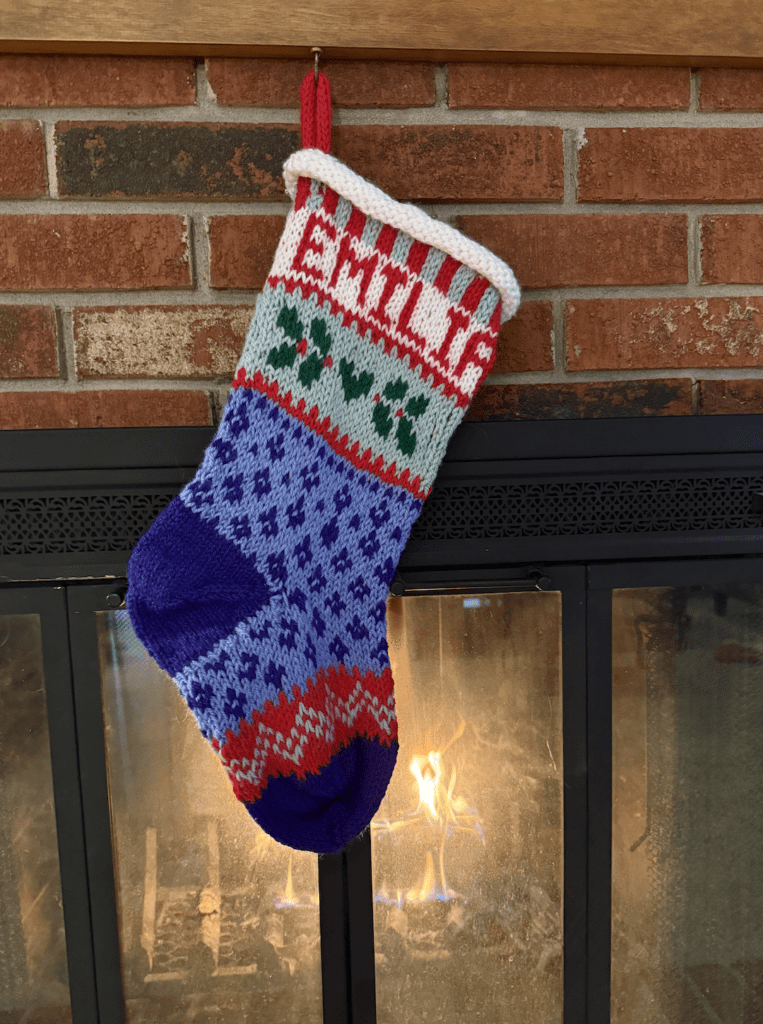
 My college roommate has 4 sons who are all married and having babies. As each baby arrives I have knit them a Christmas Stocking. My roommate keeps the handknit stockings at her home where her family gathers at Christmas time.
Christmas Stockings take me about 12 hours to knit. I use a combination of different patterns and each one is different. As you read on I will take you through the different patterns and charts that I used to make this unique, one of a kind stocking for Emilia.
This post contains affiliate inks, meaning that if you choose to click through and make a purchase, I will receive a small commission at no cost to you which helps maintain this site. Thank you!
Skill Level → Intermediate with knowledge of fair isle knitting
Skills to know ↓
- Knit
- Purl
- Cast On
- Bind Off
- Weave in ends
- Knit 2 Together
- Yarnover
- SSK
- Knitting in the round
- Fair Isle Knitting
Needles
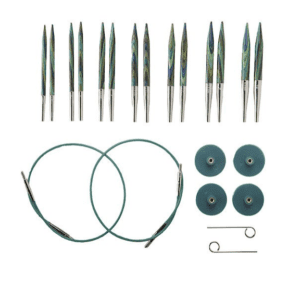
Knitpicks Caspian Options Short Interchangeable Circular Set
Yarn
I love this yarn for stockings because it is an 75% acrylic and 25% wool blend that gives the stockings enough oomph but are still soft and drape well. Plus the price is right!
The colors I chose for this project are:
- White
- Christmas Red
- Christmas Green
- Bright Purple
- Wedgewood
- Pale Greenhouse
Pattern
Cascade Christmas Stocking Pattern, free on Ravelry.
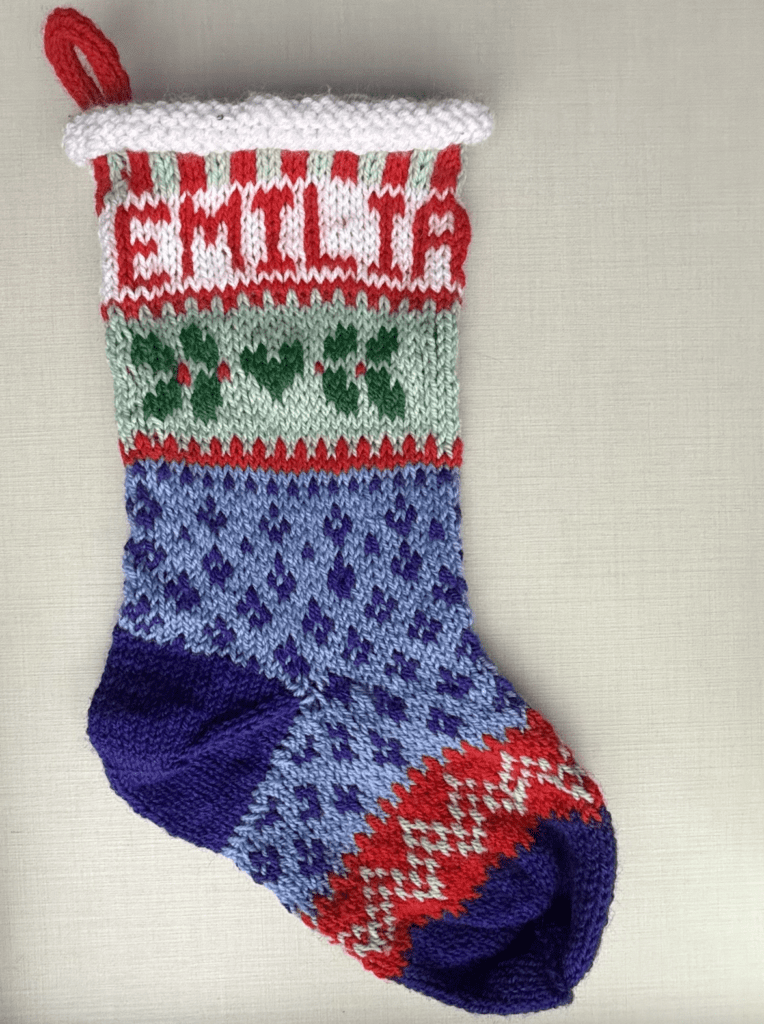
I cast on 60 stitches with the white and knit 7 rows. Then changed to Red and Light Green, knitting 7 rows of K2 Red, K2 Green.
Next section: Knit a row of white, then I used the alphabet chart from an old Mary Engelbreit book, I used the fair isle technique to stitch the name “EMILIA”. The back is plain white and I carried the red, catching the floats every 5 or so stitches.
Next: Knit a row of white, knit a row of Red
Next row: K1 Red, K1 light green.
Next I switched to a different pattern called “Annie’s Woolens Christmas Stockings” for the holly and heart chart which was 9 rows. I knit 2 rows of green before and after the chart. Then I reversed the K1 Red, K1 Green, then a row of red. This section is 3 1/4″, including the 2 red stripes on either end.
A row of blue came next followed by a row of K1 blue, K1 Purple. Back to blue and followed the allover chart in the Cascade Christmas pattern. This section up to the heel is 3 1/2″.
This Christmas Stocking uses the afterthought heel.
Learning about sock construction can help with knitting Christmas Stockings. In particular there are different ways to knit an afterthought heel.
→ See this post for my afterthought heel method with photos
After the heel I continued along with the allover pattern for 2 1/4″. Then I introduced the red with a K1 Red, K1 blue. I used a chart from the Cascade pattern again for the red and light green section, measuring 2″. Then came the heel which is 3 1/2″ from the beginning of the purple and red.
I prefer the stocking to measure 7″ from the heel and this one is over 8″. Any bigger than that and it would be too big. I do like how this turned out.
The stocking needs a loop! I prefer using the I-Cord method:
Instructions
- Cast on 4 stitches using dpn’s and your chosen yarn and needle size.
- Knit 1 row. Do not turn your work!
- Slide the stitches to the other end of the needle (the right-hand side if you’re right-handed).
- Pull the working yarn across the back of the work to begin knitting from the first stitch again. (This is what creates the tubular, seamless effect.)
- Repeat steps 2-4, knitting each row and sliding the stitches after each row, until your i-cord measures 7 inches.
- Bind off the 4 stitches when you reach your desired length.
- Finishing the loop: If you’re making this into a loop, simply sew the two ends together securely to form the loop, or attach it directly to your project as desired.
Blocking: I use a steamer to block my stockings. I try not to get too carried away with blocking because I do not want to melt the yarn. So just a light blocking works best.
Pin it!
